DIY Banner Tutorial
Banners and pennants--the hottest distinctive form of advertising of anything with a special significance at the current moment.
These latest fads are great tools to communicate specials, events, sales, etc. in your retail setting. Two Gal's has several mantras, one of which is: if you are given little space, use every single ounce of it! Instead of thinking horizontally, turn that thought 90 degrees and bring your customer's eye level up.
Five words...effective usage of retail space.
You can find these banners/pennants on
etsy starting off at $10 and going up to a whopping $50. If you have some spare time and a creative side you can create exact replicas--for practically next to nothing.
Two Gals proudly gives you...
How To Make A Banner (For Way Less Than Someone on Etsy Will Charge You):
First things first...items that you will need:
Step 1: Download or use your favorite font from Microsoft Word. For the large banner, I used
PrinterProjects.com. Print off letters.
Step 2: Using exacto knife and old magazine (no need for a cutting board with a mag), start cutting out your script.
Step 2.5: Make sure you are having an absolutely fabulous time!!
Here is what the letters will look like once you have cut them out...
(No worries if you did not pass "cutting on the line" in kindergarten...this is exactly why someone invented Sharpies!)
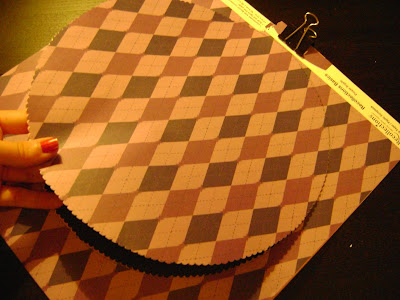
Step 3: Take some form of a round object and use a pencil to trace scrapbooking paper. A bowl works perfectly--and can be customized to the size of banner you want.
(Scrapbooking paper offers a pleasantly flaired out background--and you can usually get it on sale at your local craft store. I paid no more than $.15 per sheet for the project!)
Step 4: Using pinking sheers, cut out circular shapes.
(Two Gals Terrific Tip: When cutting out a mass amount of circles--use a paper clip to secure scrapbooking parchment along the top. This allows you to chop more at a time while maintaining consistent circles. I recommend no more than 4 sheets at a time.)
Step 5: Center letters onto paper and glue.
Step 6: Let your labor of love dry overnight.
Step 7: After the drying process has concluded; use one of the most ingenious products ever produced, a Sharpie marker, and go over any imperfections.
I also take this time to black out the PrinterProjects.com label from the bottom of the letters. Kudos to you Printer Projects, but your trademark is not the most eye appealing things on the face of the earth.
Step 8: Hit up your local craft store's $1 ribbon bin. Make small slit, about an inch in from edge of paper, and string ribbon through. Tie in a knot and make into a bow.
Front
Back
Step 9: Continue to make chain and hang in desired location!
And you're done!
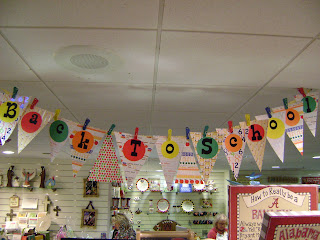
This project yielded 1 extra large banner and 2 smaller banners...
All for, drum roll please...$10.15
If you have a bit more coin to drop you can purchase pre-cut letters and create another fabulous pennant:
Maximize the look and customer appeal of your merchandise. Showcase your product or special and bring in the most dollars with any limited space!
Have you made your own banner? If so, please share--we want to see your creativity!!


